Showing posts with label OSR. Show all posts

Saturday, July 9, 2022

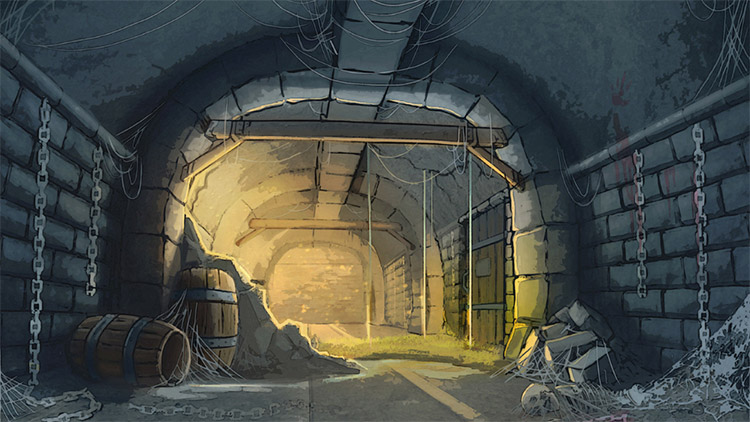
[MECHANICS] Dungeon! - Traps

Traps and the OSR

Before I talk about how Traps are intended to be used in Dungeon!, I should first touch on the overall purpose of Traps in OSR TTRPGs.

Especially today in 5e, the purpose of Traps has been completely missed by both the game designers and many DMs. For whatever reason, Traps in many modern TTRPG systems are designed for the sole purpose of being "gotcha" mechanics that serve to deplete resources. While this may be effective for the bad guys, it is in no way fun or enjoyable to the players. Also, it punishes the players for Exploration... One of the core pillars of TTRPG game design. Seems kind of silly, doesn't it?

Enter the OSR. Many people in the OSR community seem to truly understand the purpose of Traps; Traps should serve as a puzzle or problem to solve. This puzzle or problem may require resources to solve, but it shouldn't take those resources away as a "gotcha," instead allowing the players to actively choose how to handle the Trap in a way that may cost them specific resources. GMs should design Traps to be somewhat obvious, but they guard something tempting or important to the players, such as a chest of treasure or the way into a dungeon. Traps shouldn't be haphazardly placed everywhere, only in places where it both makes sense and serves a purpose.

If you still aren't sold, I recommend checking out the videos below.


Traps in Dungeon!

With the purpose of Traps established, I can now delve into their use in Dungeon! Traps should be used sparingly and intelligently, as detailed above. Use Traps as puzzles, NOT as "gotcha" moments.

If you are used to other systems, you may be inclined to hide Traps behind Skill Checks. DO NOT DO THIS! Why? Because as the GM it is your job to tell the players what their characters see, hear, smell, etc. Their senses of a room shouldn't be up to an arbitrary roll. Just tell them what is in the room, what it smells like, what they hear, etc. They may then take that information and make decisions. Simple.

Now, you may ask, do I just tell them, "Hey, there's a Trap in this room." You should! Just do it in a subtle way. For example, in a room with a one-way dart Trap you may describe one of the walls as "dotted with holes" while the one directly across is "chipped and pock marked." The players will then realize what you said is a clear indication of a Trap. If they don't... Well, they will learn very quickly.

Next, be open to creative solutions to Traps. Not every Trap will have a logical and easy way to be disarmed, so more creative solutions may be required. Also, even simple Traps can be solved creatively. The dart room mentioned above could potentially be solved by a Fighter with a metal Shield just carefully walking by the trap, hiding behind their Shield. Remember, Traps are puzzles, not necessarily resource taxes. This Shield solution is very simple and costs the party little to nothing. And that's okay! It's a simple and smart solution to a simple problem. That should be rewarded.

Finally, some example Traps are below. Each Trap includes a description, options for how the Trap is triggered and mechanics for how the Trap "Attacks." Additionally, each Trap lists 4 possible locations where you may find such a Trap. Feel free to roll 1d4 on these lists to place these Traps throughout your dungeons.

  • Alarm Trap: A trap that makes noise or otherwise gives away the position of those who trigger it.
    • Possible Triggers: A weighted pressure plate, a tripwire, lack of Stealth, etc.
    • Effect: If triggered, the Trap alerts nearby Monsters. The GM rolls the Encounter Die, but 3 or less counts as a 1.
    • Locations: 1; A room full of bells attached to tripwires via pulleys. 2; A silent room where the floor is covered with calm but deep water. 3; A room where a large guard dog sleeps. 4; A hallway full of hanging strings of glass bottles.
  • Boulder/Rockfall Trap: A trap which allows gravity to drop a rolling boulder or pile of rocks onto targets.
    • Possible Triggers: A weighted pressure plate, a tripwire, etc.
    • Effect: If triggered, Targets within a 10-foot Radius of the trigger must roll a Save. If they fail, they take 5d6 Damage. If they succeed, they take half as much Damage.
    • Locations: 1; A room containing a golden idol on a weighted pressure plate. 2; A hallway with obvious scuffs along the walls and a hole in the ceiling. 3; A crumbling cliffside path where small chunks of different colored rocks are scattered. 4; A long hallway with an obvious round boulder visible in a high place.
  • Chute: A trap that uses gravity to displace its targets to a lower location, such as the lower level of a dungeon.
    • Possible Triggers: A trapdoor, a suspicious lever, etc.
    • Effect: If triggered, the target must roll a Save. If they fail, they fall down the chute, being spat out wherever the chute leads. It is near-impossible to climb up a chute. If they succeed, they simply sidestep this Trap.
    • Locations: 1; A hallway with missing floor tiles, where each missing tile shows a different chute. 2; A room where the entire floor is a massive trapdoor. A chest sits in the middle of the room. 3; A room with many trap doors built into the floor. Some are open, some closed. Multiple levers can be seen on the walls, some pulled, some not. 4; A room where the only way out is a visible Chute.
  • Dart Trap: A trap that fires sharp darts at targets.
    • Possible Triggers: A weighted pressure plate, a tripwire, etc.
    • Effect: If triggered, the GM rolls 1d20 + 10 versus the target's AC. On a hit, the target takes 3d6 Damage.
    • Locations: 1; A hallway with holes in the walls. 2; A wall where many faces are chiseled, each with open mouths. 3; A chest with a suspiciously large keyhole. 4; A large statue with holes for eyes.
  • Dart Trap (Poisoned): A trap that fires sharp, poison tipped darts at targets.
    • Possible Triggers: A weighted pressure plate, a tripwire, etc.
    • Effect: If triggered, the GM rolls 1d20 + 10 versus the target's AC. On a hit, the target takes 3d6 Damage, and they must roll a Save. If they fail, the gain the Affliction Poisoned 3.
    • Locations: 1; A hallway with holes in the walls. 2; A wall where many faces are chiseled, each with open mouths. 3; A chest with a suspiciously large keyhole. 4; A large statue with holes for eyes.
  • Fire Trap: A trap that cooks its targets with hot flames.
    • Possible Triggers: A weighted pressure plate, a suspicious lever, etc.
    • Effect: If triggered, the target must roll a Save. If they fail, they take 3d6 Fire Damage. If they succeed, they take half as much Damage.
    • Locations: 1; A dragon statue with a gaping mouth. 2: A room where the floor is covered with pipes and pressure plates. 3; A room where magical orange crystal floats in the middle of many pressure plates. 4; A room where the ground is coated with oil and many burning lanterns haphazardly hang from above via tripwires and pulleys.
  • Gas Trap (Poison): A trap that floods an area with poisonous gas.
    • Possible Triggers: A weighted pressure plate, a suspicious lever, etc.
    • Effect: If triggered, each target within the hallway, room, etc. must roll a Save. If they fail, they gain the Affliction Poisoned 6. If they succeed, they gain the Affliction Poisoned 3.
    • Locations: 1; A snake-like statue with a gaping mouth. 2: A room where the floor is covered with pipes and pressure plates. 3; A room that has been overgrown with massive, poisonous mushrooms. 4; A hallway with holes in the walls.
  • Pit Trap: A trap that drops the target into a pit, likely filled with spikes.
    • Possible Triggers: A trapdoor, a suspicious lever, etc.
    • Effect: If triggered, the target must roll a Save. If they fail, they fall into the pit. If the pit is spiked or bladed in some way, they also take 3d6 Damage. If they succeed, they simply sidestep this Trap.
    • Locations: 1; A hallway with missing floor tiles, where each missing tile shows a different pit. 2; A room where the entire floor is a massive trapdoor. A chest sits in the middle of the room. 3; A room with many trap doors built into the floor. Some are open, some closed. Multiple levers can be seen on the walls, some pulled, some not. 4; A forest clearing with an obvious mound of leaves that seem out of place.
  • Portcullis/Wall: A trap that drops a metal gate between or onto targets. Its primary purpose is separating targets from each other.
    • Possible Triggers: A weighted pressure plate, a tripwire, etc.
    • Effect: If triggered, the target must roll a Save. If they fail, they are pinned beneath the portcullis/wall, taking 3d6 Damage. If they succeed, they simply sidestep this Trap, choosing which side they end up on.
      • (If the party's goal is to lift the portcullis/wall, roll 2d4 x 100. This is the weight of the portcullis/wall in pounds. If the party realistically has enough manpower to lift this weight, they may do so [no roll is required]. If they do not have the manpower, they may choose to lift the weight [no roll required], but they each gain Exhaustion)
    • Locations: 1; An archway where a rusted portcullis clearly looms above. 2; A large room with a divot down the center and a crack/slit directly above it. 3; A hallway where a secret door seems to be hidden behind a lever. 4; A room full of treasure, but it only has one suspiciously unguarded way in.
  • Swinging Blades/Logs: A trap that uses gravity to swing weaponry at its targets.
    • Possible Triggers: A weighted pressure plate, a tripwire, etc.
    • Effect: If triggered, the GM rolls 1d20 + 10 versus the target's AC. On a hit, the target takes 2d6 Damage.
    • Locations: 1; A hallway with a suspiciously high ceiling. 2; A slightly ajar door that leads into a small side-room. 3; A hallway that has a seemingly pointless intersection. 4; short, claustrophobic hallway with many slits in the walls.

Thursday, June 30, 2022

[MECHANICS] Dungeon! - Dungeoncrawling


Dungeoncrawling

This post is kind of "the name of the game" so to speak. If you want procedural rules to adventure through dungeons in a random way, this is the post for you.

Dungeoncrawling is very simple. The GM should have an idea of what the dungeon should be like. This could be a loose idea they can improvise off of, or a fully mapped out dungeon with multiple floors and many rooms. In the case your GM has neither, they can refer to one of the many free random dungeon generators found online. A few can be seen below.


Dungeon Encounters

As the party traverses a dungeon, the GM may have predetermined encounters placed in specific locations, or they may opt to use the Encounter Die, similar to a Hex Crawl. This more random approach is what I recommend. This does include the extra work of making an encounter list or encounter table, but it is worth the 5 minutes of prep that will take.

If using the Encounter Die, the GM should roll 1d6 each time the party enters a new room or important location within the Dungeon. On a 1, the GM chooses an Encounter from their list or rolls on their table. On a 6, there is a different outcome. Usually, I recommend treating a 6 as a change in momentum. If the party has already faced many hardships in the dungeon, a 6 could be some good luck, such as finding treasure or a pool of healing waters. On the other side of things, a 6 could turn a cakewalk of a dungeoncrawl into a deadly combat with a tough monster.


Dungeon Turns

Finally, Dungeon Turns are an important mechanic regardless of if you use random or pre-generated dungeons. Every 10 minutes that pass within the dungeon, the GM should take a Dungeon Turn. Additionally, you may time these 10 minutes in the real world on your phone or some other timer. I prefer using a real-world timer, as it breaks up the monotony and discourages players from wasting time or slacking off.

When a Dungeon Turn occurs, the GM and players each have a couple of tasks to quickly cover. Players should account for Torches that may finish burning, Spells that may end, etc. The GM should account for any NPCs or Wandering Monsters that may also be traversing the Dungeon. The GM should also roll the Encounter Die during this time. On a 1, a Wandering Monster comes across the party, or the party comes across a trap, etc. This keeps the game moving by applying pressure, big or small, on the party. On a 6, it is recommended that the GM treat it as a change in momentum, as described earlier in this post.


*Darkness and Light (Rules Reminder)

In Dungeon!, darkness a dangerous aspect of adventuring and makes sources of light important tools.

While in darkness, a Character has Disadvantage on Attack Rolls and Saves. This does not apply to Monsters, unless the GM rules that the Monster would be impeded by the lack of light. For example, a Wolf would not be impeded, but a Bandit would be.


The 5-Room Dungeon

As a quick note, consider looking up "The 5-Room Dungeon." This pdf by Roleplaying Tips outlines the idea well. I personally do not use this idea very often, as I feel overuse of the concept makes dungeons incredibly predictable and same-y. However, it is a great introduction to creating dungeons from scratch, especially if you are a new GM. Use the outline of The 5-Room Dungeon as a jumping off point but be careful to not rely on it or overuse it.

[MECHANICS] Dungeon! - Wilderness Travel, Hex Crawls, and Point Crawls

Wilderness Travel in Dungeon!

To simulate travel, Dungeon! highly suggests that you use a hex crawl, or at least a point crawl. There is a common belief that travel in TTRPG's is boring. If your travel is boring, that likely means you are doing it wrong. Travel shouldn't be a 3-paragraph passage where the GM talks about the lore of the world, why the mountains are a certain shape, or how cold out it is. Why? Because most people find it boring.

Travel segments also shouldn't be railroaded sections of the game where player characters must move from point A to point B and encounter X, Y, and Z things that the GM has set up. Why? Because most people find it boring.

So, what should travel be?

Simply put, travel should be unpredictable. One day could be calm and eventless, only taking 1 minute or so to fully play out. The next day could be a dangerous encounter with a magical beast from which the party barely escapes alive. Now that's exciting. The mechanics below detail how to accomplish dangerous and exciting wilderness travel. If you still wish to hand-waive travel, that is your and your players' loss.


Hex Crawls

When designing a Hex Crawl, there are a few steps. Firstly, find or create a map. Below are a few free resources to aide in doing so.

Personally, I like to draw my maps by hand and then import them to a program like Gimp, where I can use overlays to create my hexes.

Also, remember that each hex is effectively a 5-mile (or 8 kilometer) radius. 5 miles is quite a big area. Many things can be present in a single hex.

Once you have your map, you may then begin to place important locations, objectives, etc. on the map. Don't worry about fleshing out each individual settlement or dungeon. Just have a rough idea that you can expand upon once the party decides to travel there. The beauty of not handwaving travel is that travel takes time. This gives you, the GM, time to prepare things while the players still get to go on fun adventures.

Your map will slowly fill out more over time, and that's ok. Not everything should be set in stone from Session 0 anyway.


Encounters

Once content with your map and its features, you may proceed to the final step: random encounter tables. Regardless of if you like random encounters or not, you should read this step. You should still prep a list of encounters to fall back on, both combat and non-combat, so that the players have something to do during travel. If you do like random encounters, simply create your list in a numbered format, likely on a d20 table or d100 table. Once you have used an encounter on the table, you should consider replacing it. Some encounters might make sense to occur multiple times, while others will not. Use your best judgement for your campaign.


Calendar

With the core of your Hex Crawl created, you should consider a few additional steps. Creating a calendar for your campaign may seem excessive, but it is truly both easy to do and pricelessly valuable. I recommend using one of the free options below to help you create it.


Weather

A final extra step should include making a Weather Table. You may choose to roll in advance for each day on your calendar, or you may simply roll each new day. You may use a Weather Flower, like this one by Goblin's Henchman, or simply use the weighted table I like to use as shown below. My table is not as realistic as a Weather Flower, but my players have never noticed a difference.
 
Step 1. Roll 2d4 to determine type of Weather present in the party's current hex. The outcome will work in almost every environment or season but will likely change in description and flavor. 
2. Extreme Precipitation (Moving to a new Hex costs 1 additional Movement Point)
3. Precipitation
4. Cloudy
5. Scattered cloud cover
6. No cloud cover
7. Sunny/Windy
8. Extreme Heat/Extreme Winds (Moving to a new Hex costs 1 additional Movement Point) 
Step 2. Roll 1d4 to determine the size of the Weather System, if applicable (i.e., rainstorms, snowstorms, clouds, etc.). On a 1, it is confined to that hex. On a 2, it is 2 hexes thick, etc. Then roll 1d6 to determine the direction the Weather System is moving, with 1 being north, 2 being northeast, 3 being southeast, etc. For each Movement Point the party uses (or for every 2 hours that pass), the Weather System moves 1 hex in that direction, possibly moving with the party.


Movement Points and the Encounter Die

Finally, as you may have guessed based on the Weather Table above, you must learn the mechanics of a Hex Crawl such as Movement Points and the Encounter Die. After finishing a Long Rest, the party gains 5 Movement Points. These Movement Points can be used to traverse hexes. There are 3 general types of hexes, which can be seen below.
  • Normal (1 MP. Common. Includes things like grassy fields, open roads, etc.)
  • Rough (2 MP. Somewhat common. Includes things like hills, forests, deserts, etc.)
  • Near Impassible (3 MP. Rare. Includes things like mountains, crags, rivers, etc.)
The GM should decide what biomes (or what color or number of each type of hex) constitute each type of hex. Normal hexes only cost 1 Movement Point to traverse, while Rough hexes cost 2 Movement Points and Near Impassible hexes cost 3. For each Movement Point used, 2 hours of time passes. If a party does not have enough Movement Points to traverse a hex, they may either stop traveling for the day or they may Push Themselves. If they Push Themselves, they become Exhausted, gaining Disadvantage on all d20 rolls, all Skill Checks, and being limited to 3 Movement Points per Long Rest instead of 5. After finishing a Long Rest, an Exhausted Character may Save to recover.

As for the Encounter Die, the GM rolls 1d6 each time the party traverses a hex. On a 1, there is an encounter. If the GM is using random encounter tables, they will then roll for a random encounter. If the GM is not using random encounters, they will simply choose an encounter from their encounter list. GMs should also not be afraid to improvise new encounters depending on the terrain or other situational effects. If a 6 is rolled on the Encounter Die, there is instead a different challenge. The GM may feel free to make this anything they can think of, but a great fallback is either a Lost Check or a Skill Challenge.

For a Lost Check, one party member must roll a Survival Skill Check. If the party member succeeds, the party continues as normal. If the party member fails, however, the GM moves the players back to the previous hex and rolls another 1d6, where 1 is north, 2 is northeast, 3 is southeast, etc. The party is then moved in the rolled direction instead of their originally intended direction. This movement consumes Movement Points equal to the hex they end up in, not the originally intended hex.

For a Skill Challenge, the GM thinks up a situation where the party must use Skill Checks to bypass an obstacle or escape peril. This could be anything from crossing a frozen creek to evading a landslide to simply trying to persuade a Troll to let them cross a bridge. The players then roll 1 Skill Check each. They may be creative with how they use their Skills to potentially solve the problem, but the GM must approve these attempts. Once a character has attempted a certain Skill, pass or fail, they cannot use that Skill again this Skill Challenge. Once the group reaches a certain number of successes or failures, or once the group has logically solved the problem via their Skill Checks and the GM's discretion, the Skill Challenge ends in either success or failure. The GM may decide the rewards or consequences of a successful or failed Skill Challenge. Some good example rewards are +1 Movement Point or some treasure, while some good example consequences could be -1 Movement Point or that each party member becomes Exhausted, as detailed in the Movement Points section.


Secret Locations

If you place secret locations on your hex map, you must make a couple of choices. You may either choose that the players automatically find these locations by traversing that hex, or you may choose that they must encounter it. From there, you have one final choice. If the party traverses a hex with a secret location, you may have the party find that location if the encounter die comes up as a 1, instead of using your encounter table. Alternatively, you may decide that secret locations are so well hidden that the party must Search the Hex to find them. Searching the Hex takes Movement Points equal to the hex's normal cost, and the party does not leave the hex. Additionally, it guarantees an encounter on the Encounter Die, or the discovery of a secret location.


Point Crawls

When designing a Point Crawl, you are effectively designing a Hex Crawl with more restrictions and less structure. Simply find or draw a map of the region, labeling details and adding locations as you see fit. You should then create paths between details and locations, deciding how many Movement Points are required to fully travel one direction along that path.

From there, a Point Crawl basically becomes a Hex Crawl. For each Movement Point used, roll the Encounter Die. For each new day, roll for Weather. A calendar is still very useful even in a Point Crawl. Almost all the mechanics of a Hex Crawl (except for Lost Checks) are still used, simply the map looks different and functions a little differently.


The Average Adventuring Day

With all of these details in mind, the average adventuring day out in the wilderness, whether you are playing a hex crawl or a point crawl, should be similar to the adventuring day outlined below. It does not have to be as exact or even follow the same patterns or times, but the breakdown below provides a realistic schedule to follow.

Midnight to 6 AM: Long Resting

6 AM to 7 AM: Breakfast/Preparations

7 AM to 11 AM2 Movement Points

11 AM to Noon: Lunch/Short Rest

Noon to 6 PM3 Movement Points

6 PM to 10 PMDinner/Downtime

10 PM to MidnightLong Resting

Dungeon! SRD V4 and More

Hi everyone! I'm happy to announce an updated Version of 4 of the Dungeon! Ruleset . After a lot of time, testing, and a few important c...